A scratch, a dull patch, and a lifting edge can all look like variations of the same complaint. They are not. A modern automotive finish is built in layers: clear coat on top, the color layer below it, primer beneath that, then the panel itself or its factory coating. Where the damage stops decides what the repair has to do. Read the layer wrong and you either pay to refinish a panel that only needed a polish, or polish a spot that has already lost its color and see the mark return. The observations below take a few minutes and answer that question before anyone quotes a job.
What the Clear Coat Actually Does
The clear is a working layer, not a shine. It carries the gloss and does most of the work of shielding the color layer from sunlight, weather, and chemicals, which is why a neglected finish shows its damage at the top before the color ever looks wrong. It is also thin, thin enough that polishing removes a very small amount of it. That makes polishing a correction of the top layer rather than a rebuild of it, and it means there is only so much of the layer to work with.
Metallic and pearl effects live in the color layer, below the clear. That detail matters more than it sounds. Damage that reaches the color changes the way light comes off the panel, and no amount of polishing above it will put that back, because the flake doing the reflecting sits underneath the layer being polished.
Reading a Scratch in Two Minutes
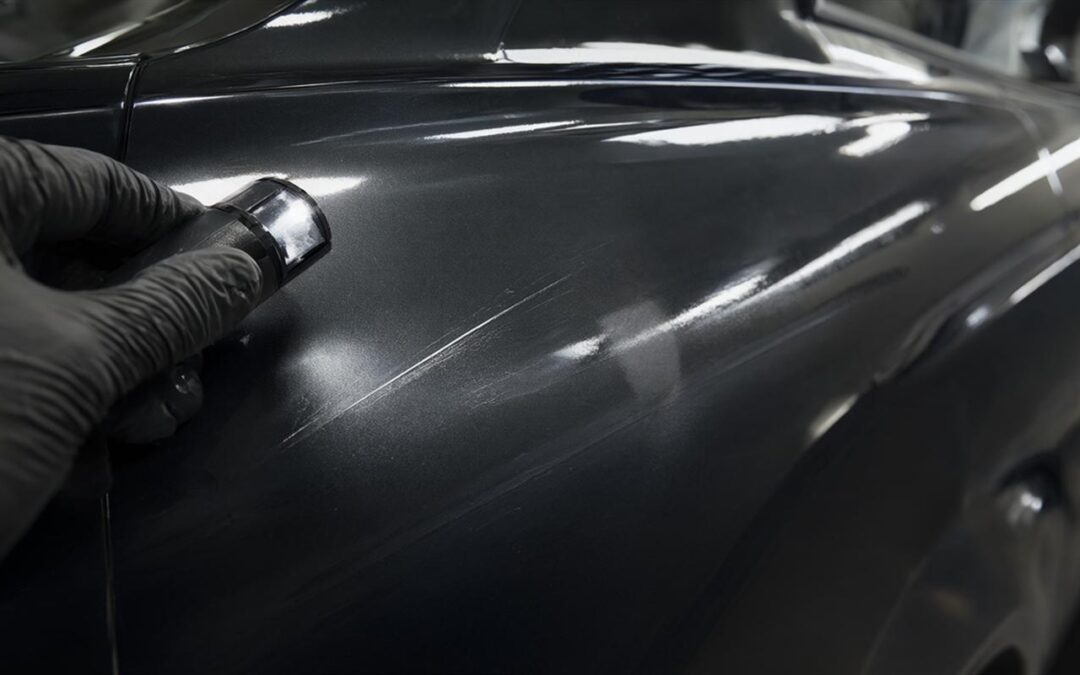
Start with a light fingernail drag across the mark, not a press. A scratch whose edge catches your nail has generally passed out of the clear layer; one that glides has generally stayed inside it. Then look at the color. If the mark only scatters light and the paint around it still reads the same shade, the clear is the layer that took the hit. If the shade under the mark now looks different, or a light line shows against dark paint, the damage has gone below the clear.
Owners tend to describe that first group as paint scratches not through paint, and the label is fair: the damage stops in the clear. That is also the group a polish can reach, since polishing works on the top layer and nothing else. The lightest option at that point is detailing with exterior polishing, and a partial package can target the outside of the car on its own if the interior needs nothing. Where the nail catches, the same polish will not close the mark.
When the Surface Fails Without a Scratch
Not every finish problem starts with an impact. Dullness, haze, and water-spot etching that come back soon after a wash point to a clear layer that is thinning or breaking down rather than one carrying a hole. The surface may feel slightly rougher under a fingertip, and the panel can look darker in one area than the panel beside it. This is the shape clear coat damage takes on a car that gets washed more often than it gets polished.
The useful read here is a test spot in an inconspicuous area, because a polish that brings the gloss back tells you the problem is sitting on the surface, while a spot that stays dull after the same work tells you the film itself has changed. Neither result is a verdict on the whole car. It is a reading of one panel, and the panels that face the sky are the ones worth reading first.
When the Top Layer Lifts
Clear coat peeling is a different problem from a scratch, and it does not answer to the same work. Peeling usually begins at a panel edge, a seam, or a stone chip where the film has already failed, and once an edge lifts it keeps spreading because the bond underneath is broken. Polishing does not reattach it. Wax does not seal it, and covering the edge does not hold it in place.
What changes once the clear lifts is how exposed the color layer is. Under the clear it was shielded; out from under it, the color degrades faster than it did before, which is why a peeling area rarely stays the same size or the same appearance for long. That is the point where the question stops being which polish and becomes how much of the panel, or how many panels, need refinishing. A lifted spot the size of a coin and a hood that has failed from edge to edge are not the same job.
Chips and Cracks That Go All the Way Down
A chip that shows gray, white, or bare metal has taken all three layers with it. No polish takes that back. The color is gone from that spot, the primer or the metal underneath is what you are seeing, and the repair now has to put material back rather than smooth what is there.
Touch-up paint covers an exposed layer and slows what happens next, but it does not restore a level, invisible surface. On a daily driver it is a reasonable stopgap, and it is not the same result as refinishing the area. Where chips line up along the front edge of a hood or the face of a bumper, the count matters as much as the depth, because several small repairs in one area usually point toward refinishing that panel.
What Each Reading Points Toward
The reading is only useful if it points somewhere. Four paths come out of those readings, and the difference between them is chiefly which layer is missing and over how much area. Depth tells you whether polishing is even an option; area tells you whether the job stays on one panel.
- The clear is scuffed but intact: polish the top layer.
- A small patch of clear is gone and the color still reads evenly: repair the clear over that patch.
- The color layer is exposed, or a chip has reached primer: refinish the panel and blend it into the panels beside it.
- The film has failed across several panels: plan a broader refinish instead of repeating spot work.
Turning that into an estimate is a judgement about the panel in front of you rather than a menu. It is what decides the scope of the paint services Revive Auto Center takes on, and paint matching there works from the color, texture, and finish the vehicle has now, using color-matching equipment rather than an eyeballed mix. The same question of scope comes up whenever the damage is wide enough that a repair and a change of color are both on the table, and paint repair versus a color change sets out how that call gets made.
When the Paint Is Fine and the Panel Is Bent
A dent that has not broken the paint is the case where the finish can be kept. Paintless dent repair works the dent out from behind the panel and leaves the original finish in place, which is why it suits door dings, hail hits, and minor creases that have not disturbed the surface above them.
It depends on paint that is still intact and flexible at the dent, so a dent with cracked or lifting clear is not a candidate, no matter how shallow it looks. That is the same boundary this article keeps drawing from the other direction: the condition of the finish decides the method. For a dent that qualifies, the work sits under the shop’s paintless dent repair services, and the wider split between the two methods is set out in paintless dent repair compared with traditional body repair.
Sun, Heat, and the Panels That Age First
Sun exposure breaks a clear coat down from its outer surface, and flat panels that face the sky, such as the hood, roof, and trunk lid, usually age first. That is why a Phoenix car can have a chalky roof and doors that still hold their gloss. The panels taking the most direct sun are the ones whose clear thins first, and they are the ones worth checking when the rest of the car still looks sound.
Once a top surface has gone hazy, the layer is thinner than it looks and the color underneath is closer to being exposed than the shine suggests. Films and coatings do not replace a clear that has already thinned, but they change what the panel is asked to absorb. The differences between those options are set out in protection choices for Phoenix sun and heat.
What to Bring to the Estimate
An estimate moves faster when the observation work is already done. Photographs taken in shade and in direct sun show two different things about a finish, and a simple map of which panels are affected does more for the conversation than a description over the phone.
Previous paint and bodywork belongs in that conversation too, because a repainted panel behaves differently from a factory finish, and a blend that worked once may not be the blend that works now. It helps to know whether the spot has been there for a season or for years, since a change that showed up recently reads differently from one that has sat unchanged. When you are ready, a free estimate can be arranged and the panels can be looked at with you.
- Shots in shade and in full sun
- A simple map of the affected panels
- Whether a nail catches on the mark or glides across it
- Roughly how long it has looked that way
- Any earlier paint or bodywork on those panels
Key Takeaways
Two questions settle most of these cases, and the order matters. First, which layer took the damage. Second, how many panels show the same problem. Depth decides whether polishing is in the conversation at all. Extent decides whether a panel repair or a broader refinish is the honest scope, and a quote that answers the second question without the first is usually answering the wrong one.
- Read depth before you read scope.
- A mark that glides under a nail and shows no color has stayed in the clear.
- Clear that has lifted is a bond failure, so how far it has spread matters more than how big the lifted spot is.
- A chip to primer or metal is a refinishing question, not a polishing one.
- Damage that reaches the color layer cannot be polished back into the panel.
Conclusion
The gap between a mark that polishes out and a chip that needs a panel is measured in the film itself, and a photograph rarely shows it. A light, a fingernail, and a minute at each panel show it clearly. Revive Auto Center reads a finish that way before quoting work, and the shop stays independent of insurance company agreements, so the recommendation follows the vehicle rather than a carrier’s preference. The observations above are the same ones that conversation starts with.